How to use neuropad®?
Detailed instructions for usage
Nerve damage to the feet is a common complication of diabetes, but is often not noticed until it has become quite advanced, potentially leading to serious complications. neuropad® helps to solve this problem with a simple colour change test and provides an early warning sign of possible more serious nerve damage.
It’s simple to apply, but here is a handy guide to applying the neuropad®. Save time by running through these steps on both feet together.

Step 1 – Open the outer pack
- Open the outer cardboard pack
- Remove the user instruction card and foil packet.
- The instruction card provides guidance similar to this page.

Step 2 – Remove all footwear
- Remove your shoes and socks or stockings, so that your feet are bare.
- Wash and then thoroughly dry your feet if necessary.

Step 3 – Wait for 5 minutes
- Now wait at least five minutes to let your feet acclimatise to your environment.
- Make sure your hands are also clean and dry to ensure that no moisture is transferred to the pads.
- It’s vital to ensure that your feet and hands are completely dry, so that the tests can be as accurate as possible.

Step 4 – Open the inner foil packet
- Open the silver-coloured foil pack by tearing down from the marked notch.
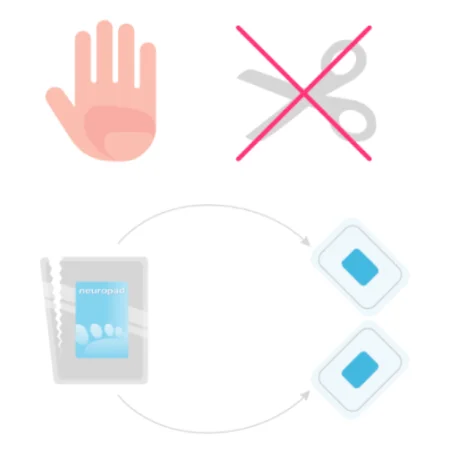
- Remove the two plastic sleeves which contain the sweat function test pads (one for each foot).
- Do not use scissors to open the pack.

Step 5 – Remove the pads from the foil packet
- Remove the pads from the foil packet.
- Ensure that each pad is blue and has no signs of pink.
- If there is any pink present, please discard the pad and stop the testing.

Step 6 – Apply the neuropad
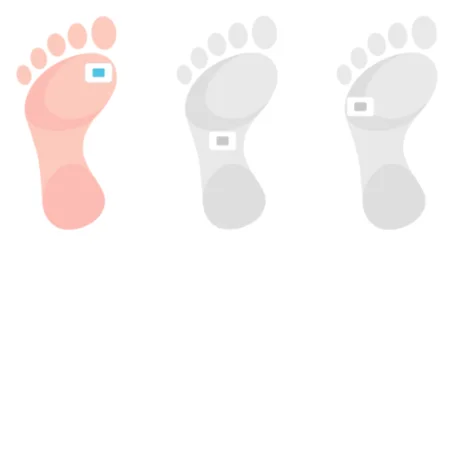
- Choose a position on the sole of your foot to apply the pad. Ideally this should be on the ball of the foot as shown (far left picture).
- If the ball of your foot has a lot of callus, please apply the pad to one of the two alternative positions.
- If you can, please apply the pad in the same position when re-testing each time, as this will allow your health professional to get a better impression of how your condition / treatment is progressing.
- During the 10-minute testing, please keep your foot raised and the part of the foot where you have attached the pad off the floor.

Step 7 – Wait for 10 minutes
- Start the countdown as soon as you have stuck the Neuropad on to the sole of your foot.
- Do not remove the pad until 10 minutes have elapsed.

Step 8 – Record the results
- Finally, record the results for both feet on the results card attached to the printed instruction booklet
- Match the colour of the pad on your foot to the images on the results card.
The pad is pink

Normal result.
Feet are sufficiently moist and soft.
Pad is blue / pink

Positive for anhydrosis (inability to sweat).
Sudomotor dysfunction detected. Evidence of small fibre denervation and of autonomic neuropathy.
If home testing, report findings to your healthcare team. Start daily treatment with neuropad® foot repair foam.
Pad is blue

Positive for anhydrosis (inability to sweat).
Sudomotor dysfunction detected. Evidence of small fibre denervation and of autonomic neuropathy.
If home testing, report findings to your healthcare team. Start daily treatment with neuropad® foot repair foam.

